How to Configure DHCP Server on centOS 8?

Welcome back! DHCP(Dynamic Host Configuration Protocol) is the most important protocol in network design. In this quick article, I’ll show you how to configure DHCP Server on centOS 8. Also, the configurations in this article will help you to pass the Red Hat System Administration exams. Let’s get started.
My Setup
centOS 8 installed in VMware workstation 15.5
Server IP: 192.168.1.10 (Static IP)
1 . Configure Static IP
Refer the article below. I explained it in my previous article.
2 . Install DHCP Server
Use the following command to install DHCP package via terminal.
sudo yum install dhcp-server.x86_64
Check out whether it installed or not.
rpm -qa dhcp-server
-q option means to query and -a means all. Then above command query all details about the “DHCP-server” package.
3 . Configure the DHCP Server
The main configuration file related to DHCP is stored in /etc/dhcp/ directory. There are two separate files for IPv4 and IPv6 protocols.
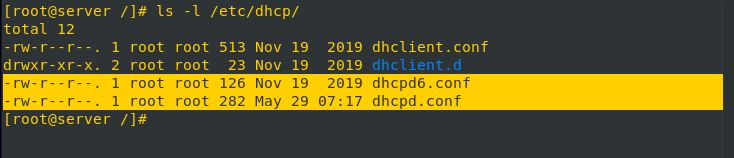
dhcpd.conf – for IPv4 DHCP configurations
dhcpd6.conf – for IPv4 DHCP configurations
In this article, we use only IPv4 addresses. So open dhcpd.conf file using vim or nano.
vim /etc/dhcp/dhcpd.conf
Then you can see there are no any configurations in dhcpd.conf file. Use the following syntax to add dhcp pool into your server.
I need to add a 192.168.1.0/24 subnet into the DHCP pool but the first 20 IPs need to be excluded from the pool.
Default Gateway is 192.168.1.1 and
My DHCP Server also serves as a DNS Server. So DNS IP is 192.168.1.10
The domain name is ccnapoint.com
Add the above details into dhcpd.conf file as follows.
subnet 192.168.1.0 netmask 255.255.255.0 {
range 192.168.1.20 192.168.1.254;
option routers 192.168.1.1;
option domain-name-servers 192.168.1.10;
option domain-name “ccnapoint.com”;
default-lease-time 86400;
}

4 . Enable & Start the DHCP Service
To enable the service on centOS use the following systemctl command.
sudo systemctl enable dhcpd
Above command add a DHCP service as an auto startup program when centOS booted up. Use the following command to start the DHCP service.
sudo systemctl start dhcpd
If the terminal prompted without any error, that means you have successfully configured the DHCP server.
5 . Test DHCP Service
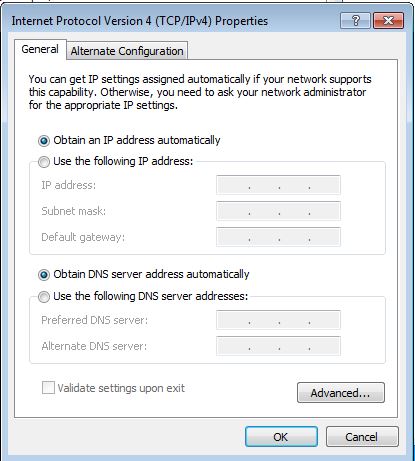
I booted up a windows 7 machine to test the DHCP server. My CentOS server and windows 7 machine are in the same vmnet (VMware virtual switch). I changed windows IP settings to obtain the IP addresses automatically via the DHCP server in the network.
Now I move to command prompt and type ipconfig and hit enter to check the IP address assigned from our DHCP server.
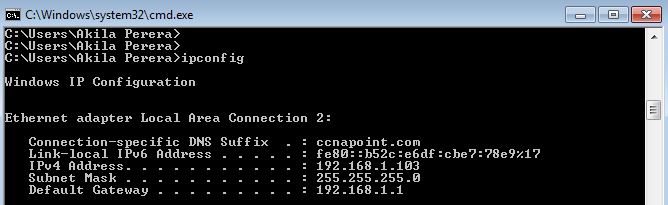
Now my windows 7 machine got a IP from DHCP server.
6 . Check DHCP Leases
To check what IPs are leased from pool, you can simply open following file from vim or nano.
vim /var/lib/dhcp/dhcpd.leases

That’s the IP address assigned to my windows 7 machine.
It’s all about configuring DHCP Service on centOS 8. If you have any questions, leave a comment below.