How to configure OSPF in Sophos XG firewall?

Sophos XG Firewall is one of the most powerful firewalls in the networking world. Sophos has a graphical interface and a command-line interface to manage it. This made life easier for network engineers and that’s the main reason for Sophos’ popularity. According to their documentation, Sophos XG firewall is Layer 8 firewall. It’s enough to give us a clear image of this powerful firewall.
If you’re a student who interested to learn about industry level firewalls, Sophos is best to get started. It can easily add to the GNS3 network simulation tool and perfume your tests. Sophos offers 30 days trial with all features for test the firewall. If you already know how to build a campus network, the firewall is a must before the network gets access to the internet. When we implement the firewall, it can set up to act as a default gateway for our network. In this case, we need to set up a dynamic routing protocol in the firewall to learn our internal networks to route the traffic.
This article gives you a complete guide about configuring OSPF in the Sophos firewall.
OSPF can be setup from CLI or GUI interfaces in the firewall. I would like to explain both methods. I prefer CLI because it’s fast and easy. Hence let’s start with the CLI method.
Configure OSPF from CLI.
Go to GNS3 and double click on Sophos XG firewall appliance. Then you can see the CLI interface. In this interface, you can navigate with numbers.
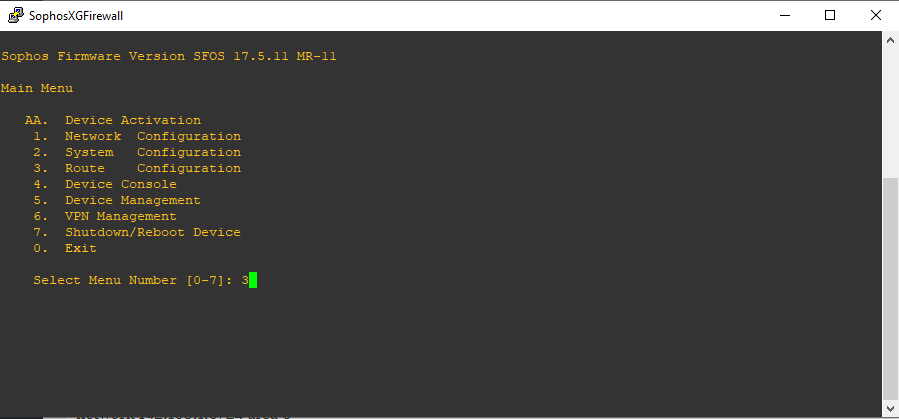
Press number 3 for the route configuration. Then select the number 1 to configure unicast routing. After that, you can see available routing protocols in the Sophos firewall.

Select number 2 for OSPF configurations.
If you have prior experience with cisco IOS commands, then this will be more familiar to you. Configurations are more likely the cisco OSPF configuration commands. In this example, I’ll add the 192.168.1.0 /24 network to OSPF with router-id 1.1.1.1 to area 0.
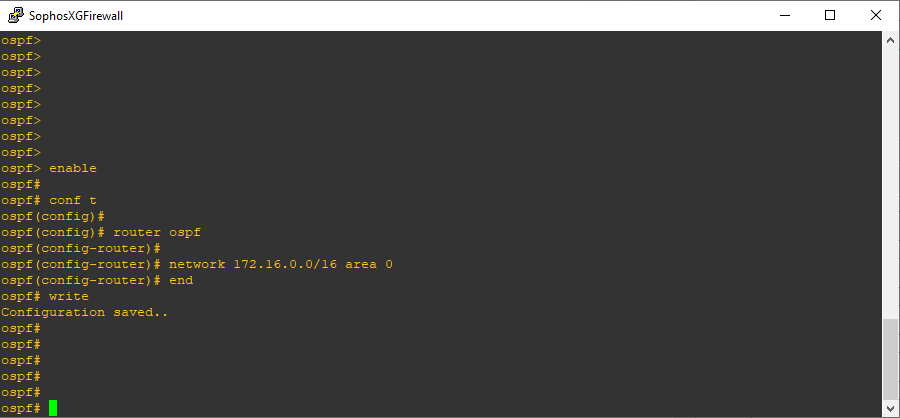
enable
conf t
router ospf
router-id 1.1.1.1
network 172.16.0.0/16 area 0
end
write
The above commands add the 172.16.0.0 /16 network to the OSPF process.
Configure OSPF from GUI.
You can do the above process from GUI as well. To access the GUI interface of the firewall, you need to add a VM with a web browser.
My GNS3 Setup.
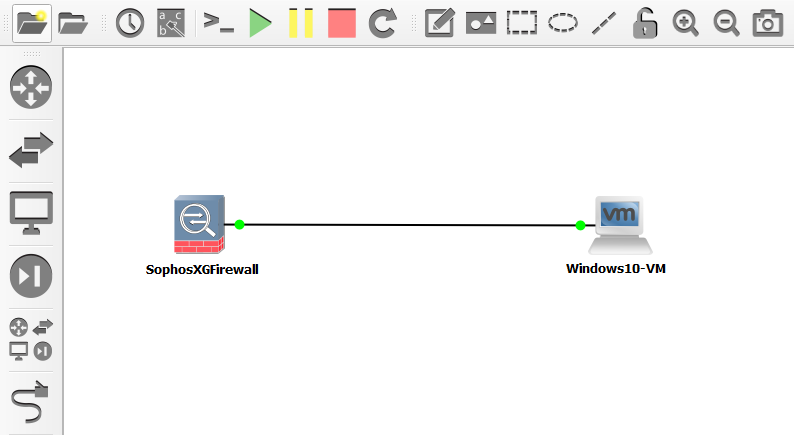
Connect VM with firewall and configure the IPs on both ends to in the same subnet. If you all done correctly, it’s possible to ping from VM to the firewall. Then open the web browser and type the firewall side IP and port number to access the GUI interface. For this example, I set up a firewall side IP as 172.16.16.16 and Windows 10 VM as 172.16.16.17/16. Then type the following IP with port number to access the GUI.
Port 4444 is the default port number that the firewall admin portal is running.
![]()
(https:// is compulsory before the firewall IP. Otherwise, you can’t access the GUI) After access to firewall IP, the browser displays a warning message about the untrusted connection.
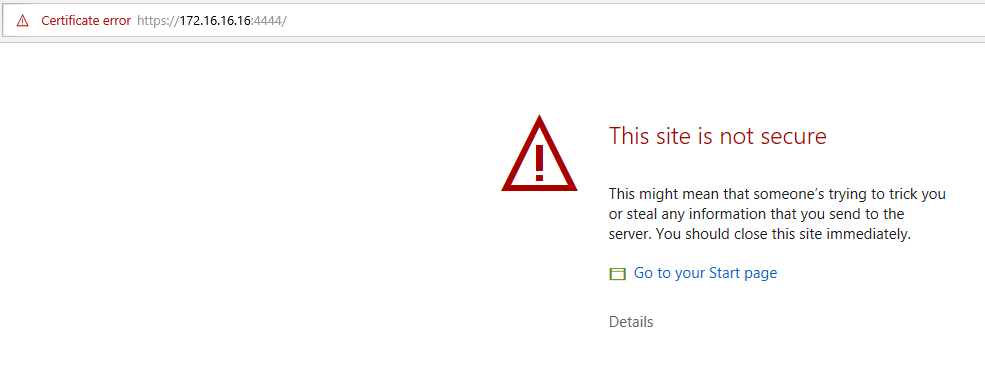 You need to accept it to access the firewall GUI. I start with a fresh ISO image, so I need to configure the firewall before login as an admin user.
The default username and passwords are the following.
Username: admin
Password: admin
Now you can navigate to the Firewall dashboard. On the left side click the link “Routing” and start to configure OSPF from the GUI.
That’s all for today’s article. If you have any concerns with the above methods, leave a comment below. I’ll reply as soon as possible.